今天服务器到期了,又觉的太卡,就又买的腾讯云的服务器,这里再记录下服务器安装部署的记录。
系统:centos 7
yum install screen
yum install git
ssh-keygen -t rsa -C "chrunlee@foxmail.com"

//把key保存起来
//把pub里面的内容粘贴到github上
//测试
ssh -T git@github.com
//添加key
ssh-agent bash
ssh-add xxx/id_rsa
//最后测试,成功
//通过nvm 来安装nodejs
//安装nvm
wget -qO- https://raw.githubusercontent.com/nvm-sh/nvm/v0.35.3/install.sh | bash
//刷新配置
source /root/.bashrc

[] 中为可选。

安装完成后,可以通过:
nvm install node //安装最新版本nodejs
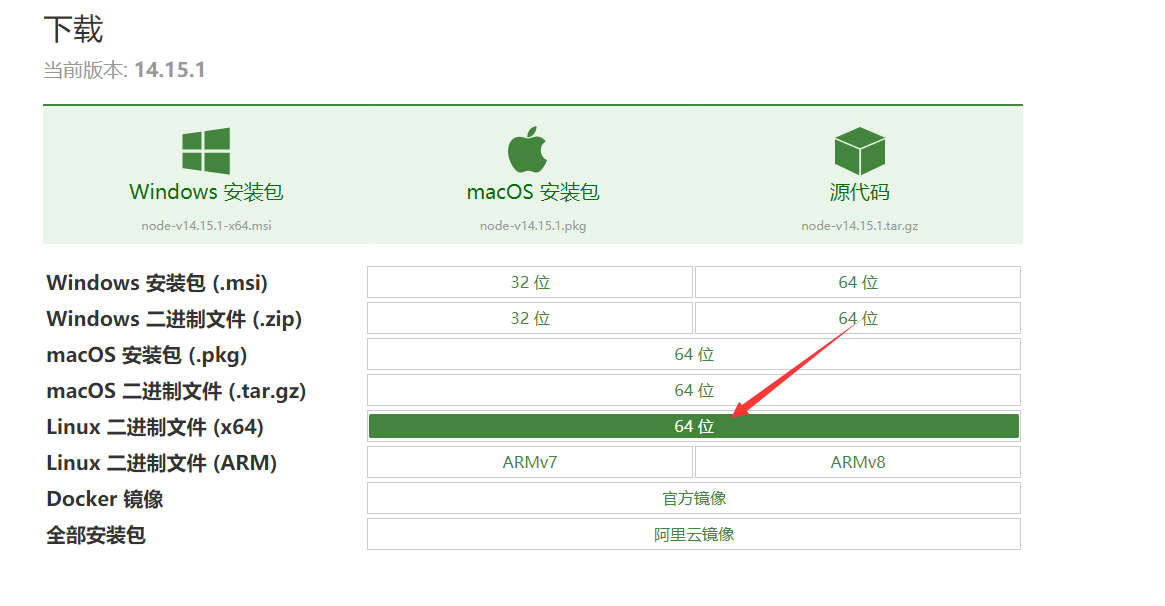
-- 如果nvm无法使用或下载不到,则使用nodejs官网下载的

//下载后上传至服务器,解压
tar -xvf xxxx.tar.xz
//进行软连接node npm
ln -s /root/nodejs/bin/node /usr/bin/node
ln -s /root/nodejs/bin/npm /usr/bin/npm
//然后需要将全局的一些命令加进来
vi /etc/profile
//在最底部增加
export PATH=$PATH:/root/nodejs/bin
//刷新配置文件
source /etc/profile
以前都是安装宝塔来管理,比较简单,不过由于目前对于linux的管理配置都不懂,所以这次不安装了,就当时锻炼,多熟悉下各个配置。
//安装基本编译环境命令
yum install gcc-c++
yum install -y pcre pcre-devel
yum install -y zlib zlib-devel
yum install -y openssl openssl-devel

wget http://nginx.org/download/nginx-1.12.2.tar.gz

tar -zxvf nginxxxxx
cd nginxxxxx
./configure //配置
make -j4 && make install //安装
//查找
whereis nginx
//测试
/usr/local/nginx/sbin ./nginx -t

//启动nginx
/usr/local/nginx/sbin/nginx
//重启nginx
/usr/local/nginx/sbin/nginx -s reload
//关闭nginx
/usr/local/nginx/sbin/nginx -s stop
//查看状态
/usr/local/nginx/sbin/nginx -V
//查看端口
netstat -anp|grep 80
//查看进程
ps -ef|grep 80
//后面专门开一个grep的练习
将以下文件放置于 /lib/systemd/system/目录下 文件名为 nginx.service 记得文件格式为unix 主要作用为使用systemctl 命令对nignx操作
[Unit]
Description=The NGINX HTTP and reverse proxy server
After=syslog.target network-online.target remote-fs.target nss-lookup.target
Wants=network-online.target

[Service]
Type=forking
PIDFile=/usr/local/nginx/logs/nginx.pid
ExecStartPre=/usr/local/nginx/sbin/nginx -t
ExecStart=/usr/local/nginx/sbin/nginx
ExecReload=/usr/local/nginx/sbin/nginx -s reload
ExecStop=/bin/kill -s QUIT $MAINPID
PrivateTmp=true

[Install]
WantedBy=multi-user.target
systemctl enable nginx  #加入自启动
nginx -t # ningx测试配置文件
wget -i -c http://dev.mysql.com/get/mysql57-community-release-el7-10.noarch.rpm
yum -y install mysql57-community-release-el7-10.noarch.rpm
yum -y install mysql-community-server --nogpgcheck
-- 安装完成,启动服务
systemctl start mysqld.service
-- mysql 链接
systemctl status mysqld.service
grep "password" /var/log/mysqld.log
mysql -uroot -p
//输入初始密码,进行重置
ALTER USER 'root'@'localhost' IDENTIFIED BY 'new password';
//先设置一个复杂的,然后再改回来
SHOW VARIABLES LIKE 'validate_password%';
mysql> set global validate_password_policy=0;
mysql> set global validate_password_length=1;

//最后删除更新源
yum -y remove mysql57-community-release-el7-10.noarch
npm install pm2 -g
//杀死screen 会话
screen -S name -X quit
目前暂时需要这几个,后续有增加的,继续补充。
转载请注明出处: https://chrunlee.cn/article/server-centos-install.html